When a gateway has no sandbox, build one yourself
XYZ Pay is made up. Everything else on this page is real work — its request shape, its two replies, the outcomes it can return, and the three screens that turn all of that into a URL your app can call. Swap in whichever payment gateway you actually need to test.
Start from what the real gateway does
Open the provider's API docs and pull out three things: the request it accepts, what it says back straight away, and what it tells you later when you ask how that payment went. To simulate a gateway, those three answers are the whole job. Here they are for XYZ Pay.
POST https://api.xyzpay.com/v1/charge

{
  "merchant_amount": 5000,
  "merchant_currency": "USD",
  "success_redirect": "https://yourapp.com/thank-you",
  "order_ref": "ORDER-1029"
}{
"txn_id": "xyz_8f2a1c9b3d",
"txn_status": "PENDING",
"checkout_link": "https://pay.xyzpay.com/c/8f2a1c9b3d",
"amount_charged": 5000,
"created_ts": 1717000000
}{
"txn_id": "xyz_8f2a1c9b3d",
"txn_status": "PAID",
"amount_charged": 5000,
"paid_via": "card",
"settled_ts": 1717000400
} Look at the names. XYZ Pay calls the money merchant_amount and the payment txn_id. The next provider will call them something else entirely. Nothing here forces you to rename them, and Step 1 is where that gets handled.
What you get at the end
You write the reply once, with a variable everywhere real data belongs. Every payment then fills those in for you — and you decide, per payment, whether it succeeds or fails.
{
  "txn_id": "{{payment_id}}",
  "txn_status": "{{status}}",
  "amount_charged": "{{amount}}",
  "paid_via": "{{payment_method}}",
  "settled_ts": "{{payment_completion_at}}"
}{
"txn_id": "pay_4c1de07a92",
"txn_status": "success",
"amount_charged": "5000",
"paid_via": "card",
"settled_ts": "2026-02-14T09:31:22Z"
}Describe the request your gateway accepts
Gateway Configuration — the first screen of the builder
Name it XYZ Pay, set the currency, and give it a default redirect URL. That URL is the fallback — MockGateway uses it whenever a request arrives without one of its own.
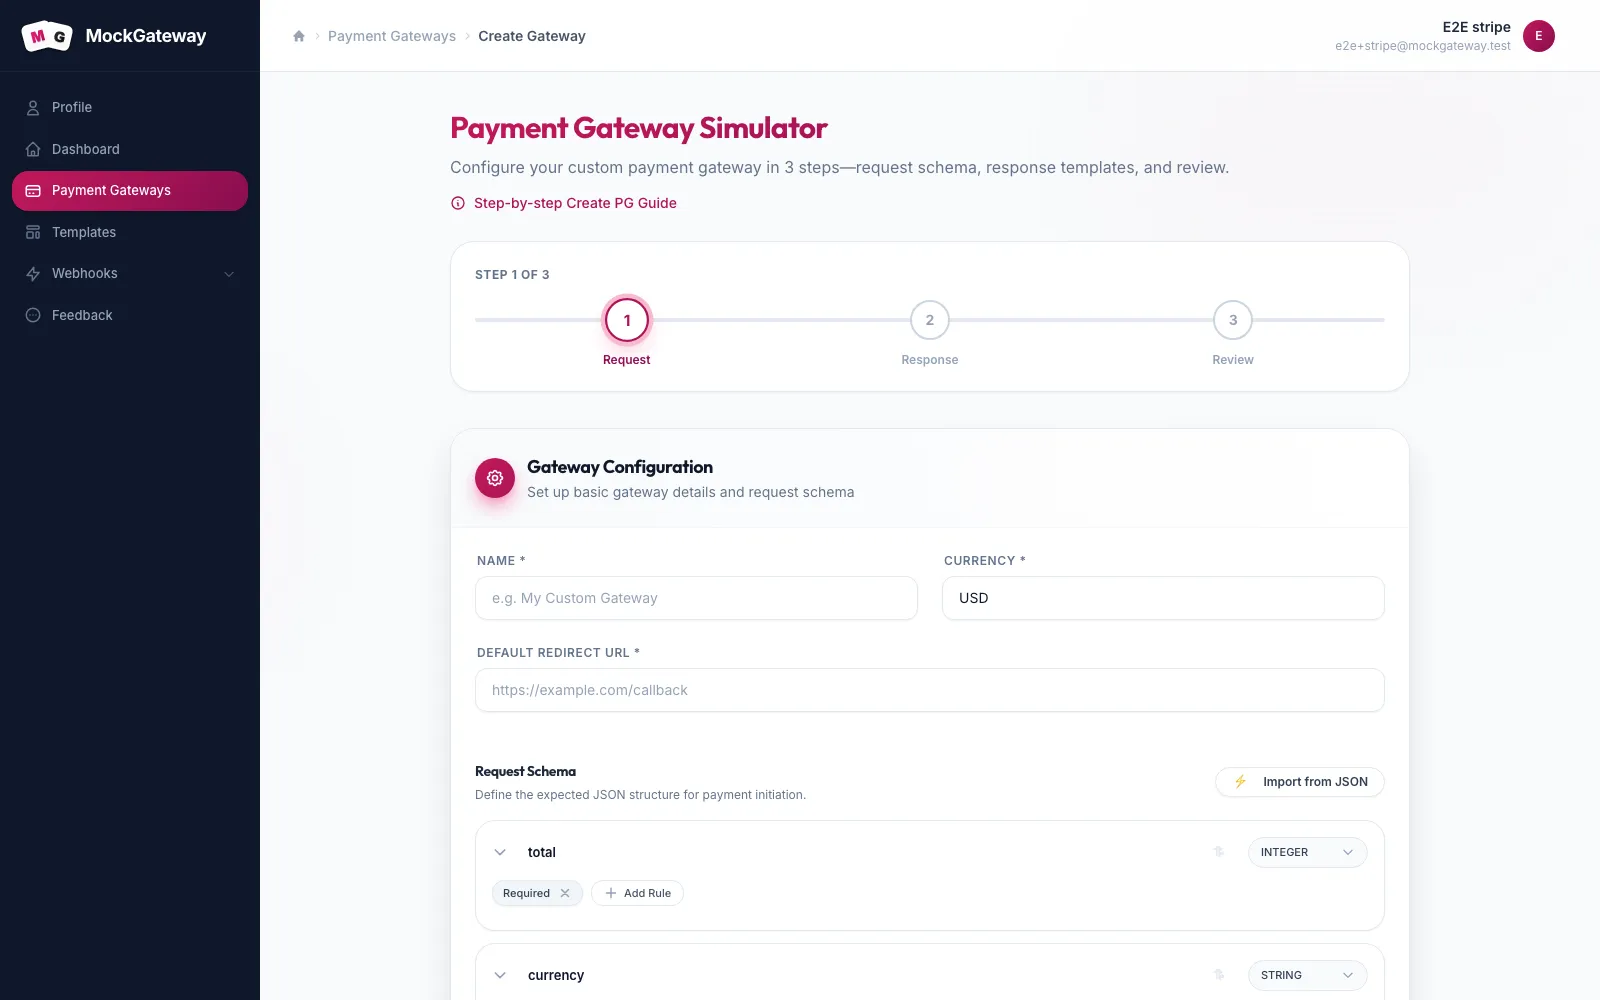
Now add one field for each thing XYZ Pay accepts. Type the name exactly as the provider writes it, pick the type, and attach the rules — required, min:1, size:3. Anything that breaks those rules comes back as a validation error, the same as it would on the real thing.
Shortcut: paste the provider's own example request into Import from JSON and every field above is created for you, types guessed from the values.
Point at the amount
Field Mapping — same screen, just below the schema
Your fields can be called anything, so one question has to be answered directly: which of them holds the money? Answer it here, and answer the redirect question too if your request carries its own return URL.
This is the one step people skip, and it is the one everything downstream leans on. The checkout page reads the amount from the first answer. The customer comes back to your site using the second.
Amount Field
Your field
merchant_amount
Mapped to
{{merchant_amount}}
Redirect URL Field (optional)
Your field
success_redirect
Mapped to
{{success_redirect}}
Shortcut: click the small tag icon inside either box to pick a field from the list instead of typing the braces by hand.
Rebuild both replies
Response Templates — the second screen
Scroll back to XYZ Pay's two replies at the top of this page and write them out again here, key for key. Wherever the provider would put real data, put a variable instead.
{{payment_url}} turns into the checkout link. {{status}} turns into whatever the payment ended up as. Keep every other key spelled the way the provider spells it, and the code in your app that reads the response never has to change.
{
  "txn_id": "{{payment_id}}",
  "txn_status": "{{status}}",
  "checkout_link": "{{payment_url}}",
  "amount_charged": "{{amount}}",
  "created_ts": "{{payment_request_at}}"
}{
"txn_id": "{{payment_id}}",
"txn_status": "{{status}}",
"amount_charged": "{{amount}}",
"paid_via": "{{payment_method}}",
"settled_ts": "{{payment_completion_at}}"
}Do not skip this one: the start reply needs {{payment_url}} somewhere in it. That is the link you send the customer to, and without it a payment has nowhere to happen.
Built-in payment outcomes
Custom gateways provide succeeded, failed, and canceled outcomes. Pending is the initial payment state. These outcomes are fixed; select one on the hosted checkout when testing.
Configure your webhook on the Webhooks page and attach it to the gateway. Each event is delivered once and its result is logged.
Launch
Review & Launch — the last screen
The final screen counts back what you built — how many fields, which currency, how many outcomes — and gives you one button. Press it and XYZ Pay exists.
- Check the field count and currency before you launch — both are quick to get wrong
- Webhook and gateway settings remain configurable; payment outcomes are fixed
- Run your first payment from the Integration tab, covered next
Now call it like any other gateway
XYZ Pay stopped being an example two paragraphs ago
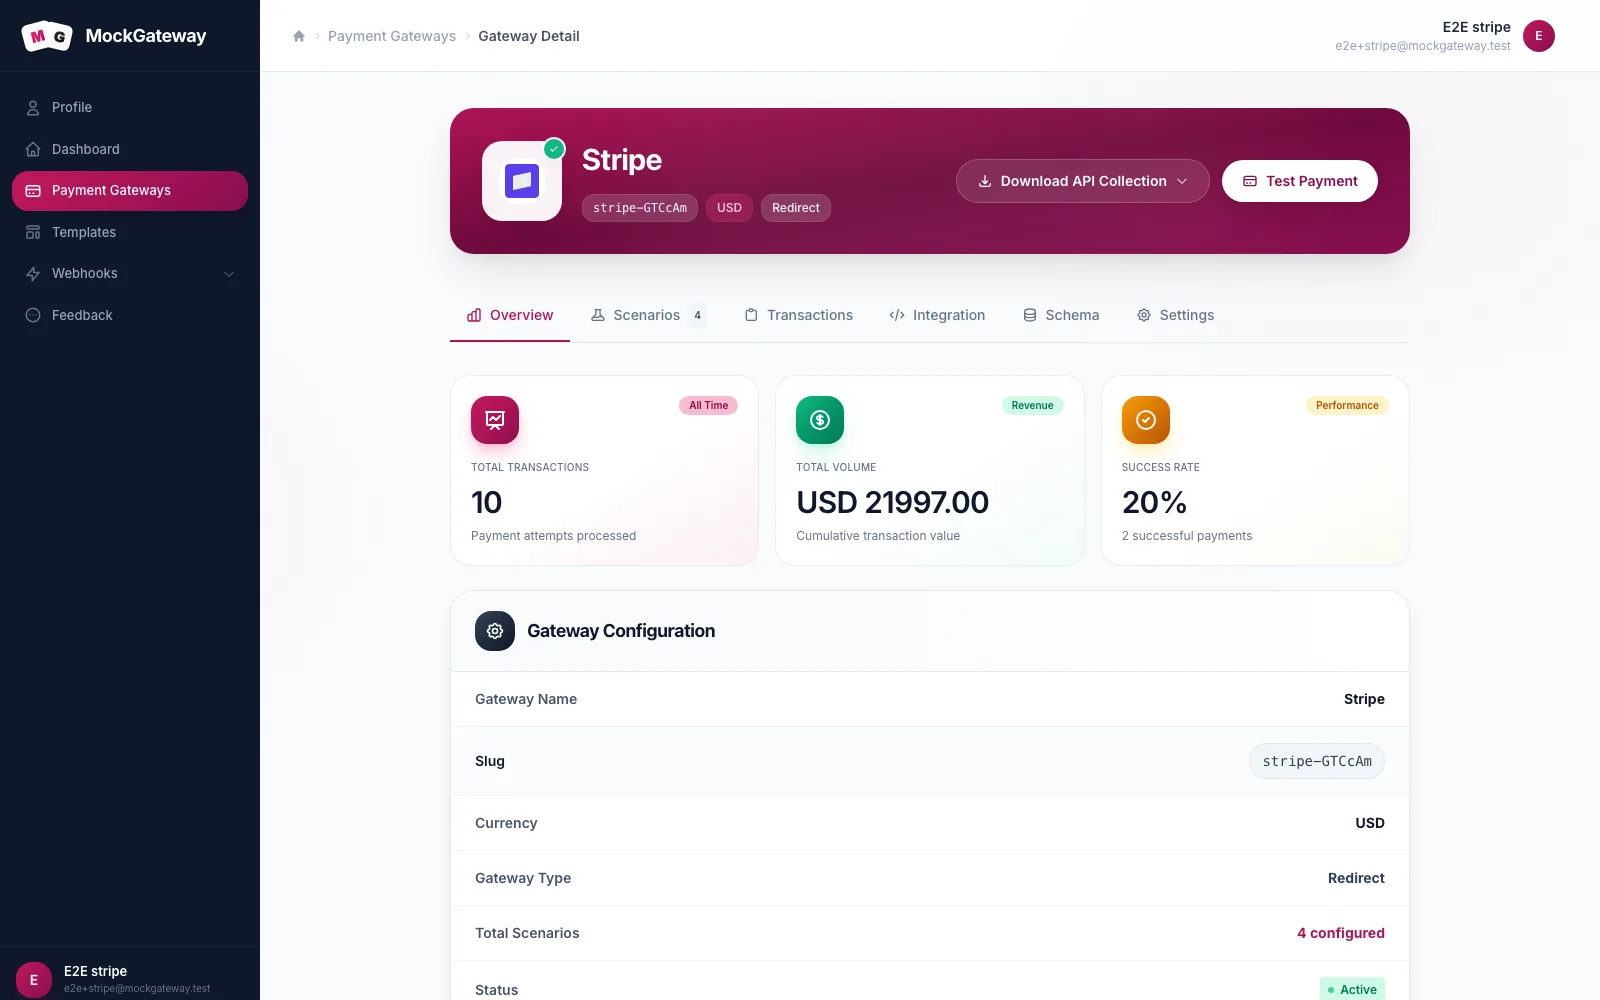
Open the Integration tab for the base URL and the API key. Every gateway you build from scratch answers on the same two paths.
Start a payment
POST .../api/base/xyz-pay/init
Check a payment
GET .../api/base/xyz-pay/verify/{id}
Send the fields you defined in Step 1 and it answers for real:
curl -X POST https://mockgateway.com/api/base/xyz-pay/init \
  -H "Authorization: Bearer sk_test_xxxxxxxx" \
  -H "Content-Type: application/json" \
  -d '{
    "merchant_amount": 5000,
    "merchant_currency": "USD",
    "success_redirect": "https://yourapp.com/thank-you"
  }'
What this proves, and what it doesn't
Your fields, your mapping, and your replies now work end to end — that is the part you built and control, and it is the part that usually breaks. The path itself (/init) is a generic one, shared by every gateway built this way. It is not automatically the same path the real XYZ Pay serves.
So when the real credentials finally arrive, expect to change the URL and any field names you guessed wrong. Everything else — your request builder, your response parsing, your webhook handler — has already been exercised.
One exception. Gateways started from a provider template copy that provider's real path exactly: the Stripe template answers on /v1/payment_intents, same as Stripe. From one of those, going live really is a base URL swap and nothing more.
Variables you can use
These work in response templates, redirect URLs, and webhook bodies. Wrap the name in double curly braces: {{variable_name}}
| Variable | What it holds |
|---|---|
{{payment_id}} | A unique ID for the payment |
{{payment_url}} | The page the customer opens to pay |
{{status}} | The payment status: pending, succeeded, failed, or canceled |
{{amount}} | The amount sent in the request |
{{currency}} | The currency sent in the request |
{{payment_request_at}} | When the payment started |
{{payment_completion_at}} | When the payment finished |
{{payment_method}} | How the customer paid — card, bank, or wallet |
{{invoice_no}} | An invoice number, created automatically |
{{error_code}} | A short code for why the payment failed |
{{error_message}} | A plain error message |
{{remarks}} | Any extra notes |
Request-input variables follow your own schema, so yours will differ. amount and currency above are only examples.
Questions that come up
Do I need an account with the real provider first?
No. Nothing on this page talks to XYZ Pay or to any live provider. You are describing how a gateway behaves, and MockGateway answers that way — so you can start the day you get the API docs, long before anyone approves your merchant application.
How do I make a payment fail?
Choose the built-in failed outcome on the checkout page when you run a payment. The redirect and the webhook both follow whichever outcome you picked, so your error handling gets exercised with the same JSON a real decline would send.
Can I change things after the gateway is created?
Request fields, responses, webhook settings and gateway settings remain configurable. Payment outcomes are fixed and cannot be added, edited, or deleted.
What about Stripe or PayPal — do I build those by hand too?
No, and you should not. Those already ship as provider templates, and a template copies the provider’s real paths and field names. Going live from one is a base URL change and nothing else. Build from scratch only when the provider you need has no template.
Have the API docs open already?
Then you have everything the three screens ask for.